Removing a Dorm Window AC: What Renters Get Wrong (2026)
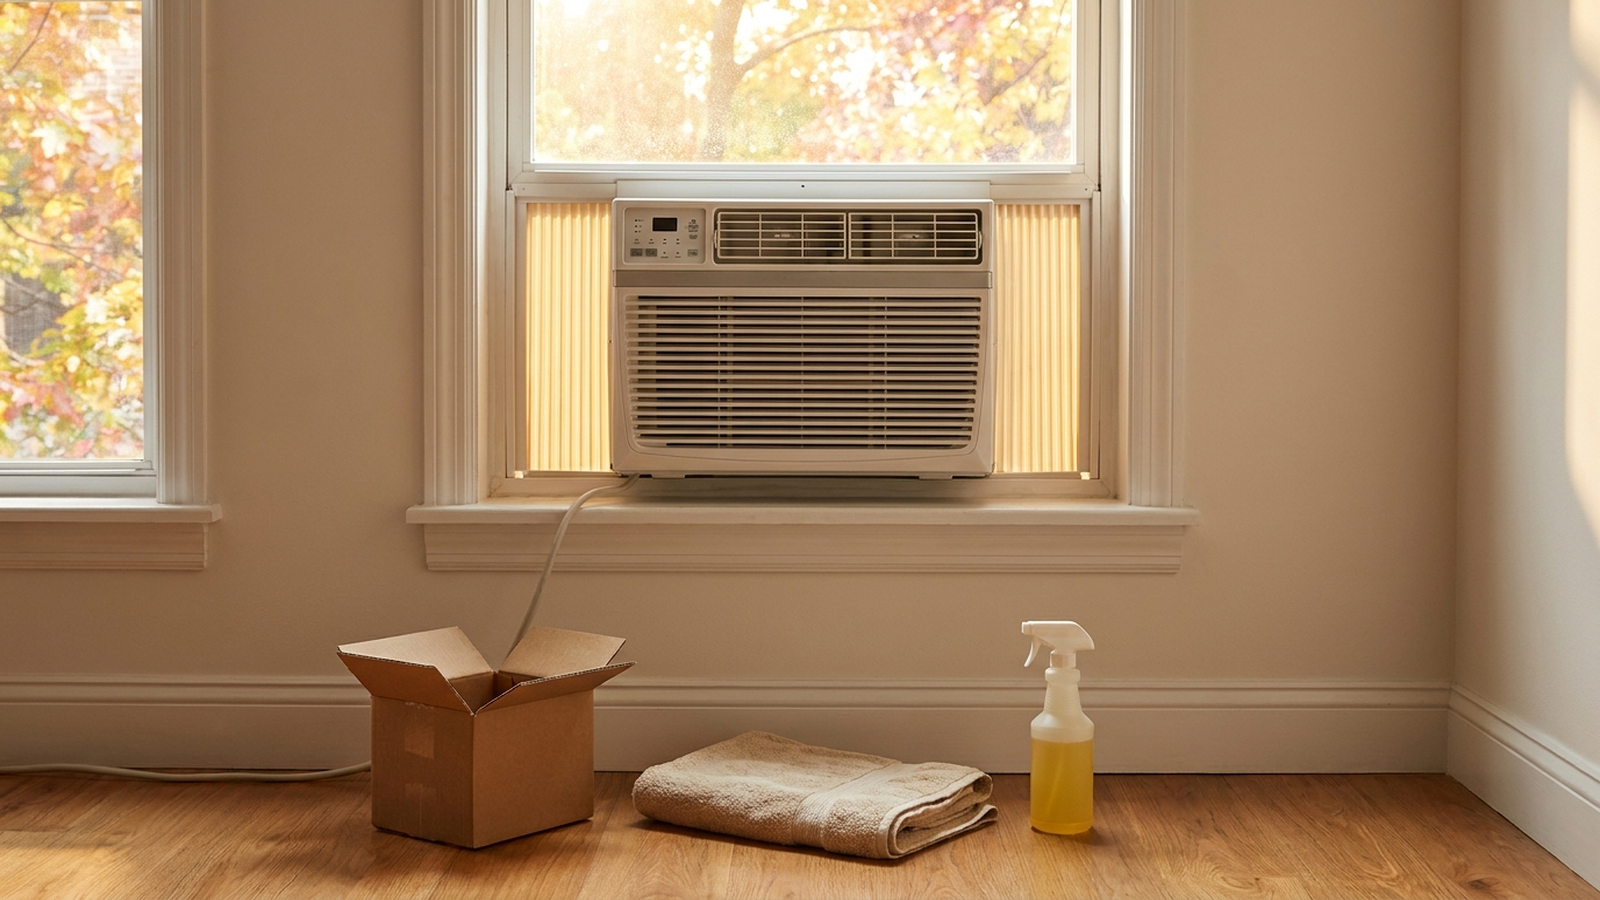
Fall move-out season means one appliance is coming out of the window whether renters are ready or not. Many colleges require it on a fixed schedule — at some schools, any air conditioner installed for the fall quarter must be removed before winter break, with room inspections checking the window frame afterward. Off-campus, the same clock is running on a different deadline: leaving a window unit in place through winter can waste real heating dollars, and a botched removal is one of the more common ways renters lose part of a security deposit each fall.
This analysis looks at what actually goes wrong when a window AC comes out — not when it goes in, which is a different set of mistakes covered in our companion piece on window AC installation errors. The removal mistakes are just as consistent across aggregated reviews and repair-forum threads, and just as fixable for under $45.
As an Amazon Associate, Arekore earns from qualifying purchases. The Amazon product links in this article may include our affiliate tracking ID and may earn us a commission if you buy through them, at no additional cost to you. See our Links Policy for details on how we select products and how commissions do not influence our recommendations.
TL;DR / Quick Verdict
- Most expensive mistake: not removing the unit at all. A window AC left in place over winter acts like a permanently open window; HVAC-industry estimates put the draft penalty at roughly $40 added to an average heating bill, and a window unit left unsealed can waste an estimated 10–15% more energy than a properly sealed wall model — directionally consistent with the U.S. Department of Energy’s figure that air leakage accounts for 25–40% of typical residential heating and cooling energy use.
- Most damage-prone mistake: rushing the physical removal alone. An 8,000 BTU unit weighs 55–60 lbs; dropping it while pulling it back through the sash is the top cause of cracked sills and bent frames reported in aggregated reviews of removal and support accessories.
- Most overlooked mistake: skipping the pre-storage clean. Dust, mildew, and standing condensate left in the coils and filter over winter are the leading cause of “smells musty” and “mold in the vents” complaints when units get reinstalled the following spring.
- Most deposit-costly mistake: no documentation. Renters who photograph the window and frame before and after removal have a paper trail; those who do not are the ones describing surprise deductions in tenant-rights forum threads.
How We Reached These Conclusions (Methodology)
This is an editorial analysis, not a hands-on review. We did not personally remove or store the products covered here. This guide synthesizes three kinds of public information: (a) recurring removal- and storage-failure themes in aggregated amazon.com customer reviews of window AC covers, insulation panels, and support brackets, sampled in August 2026; (b) removal and winterization guidance from Consumer Reports, HVAC.com, and Repair Clinic, plus U.S. Department of Energy figures on window air-leakage and residential energy loss; and (c) university housing policy pages describing fall move-out and air conditioner removal requirements. Figures such as energy savings and load ratings are manufacturer or trade-source claims unless attributed to an independent test. Prices are amazon.com figures at the time of writing and move frequently through the fall season.
Why Removal Gets Rushed
Installation happens in June with the whole summer ahead to fix mistakes. Removal happens in a single afternoon wedged between finals, a lease walkthrough, or a moving truck — which is exactly why it goes wrong more often than it should. Consumer Reports’ storage guidance is blunt on the core recommendation: remove any window air conditioner rather than leave it in place for winter, both for the unit’s sake and the home’s heating bill. On campus, the incentive is sharper still — many residence-life offices inspect the window frame and screen at checkout and bill damage against a housing deposit, the same mechanism off-campus landlords use for a security deposit.
The five mistakes below follow the actual order of a removal day, from “should I even do this” to “where does it go now.”
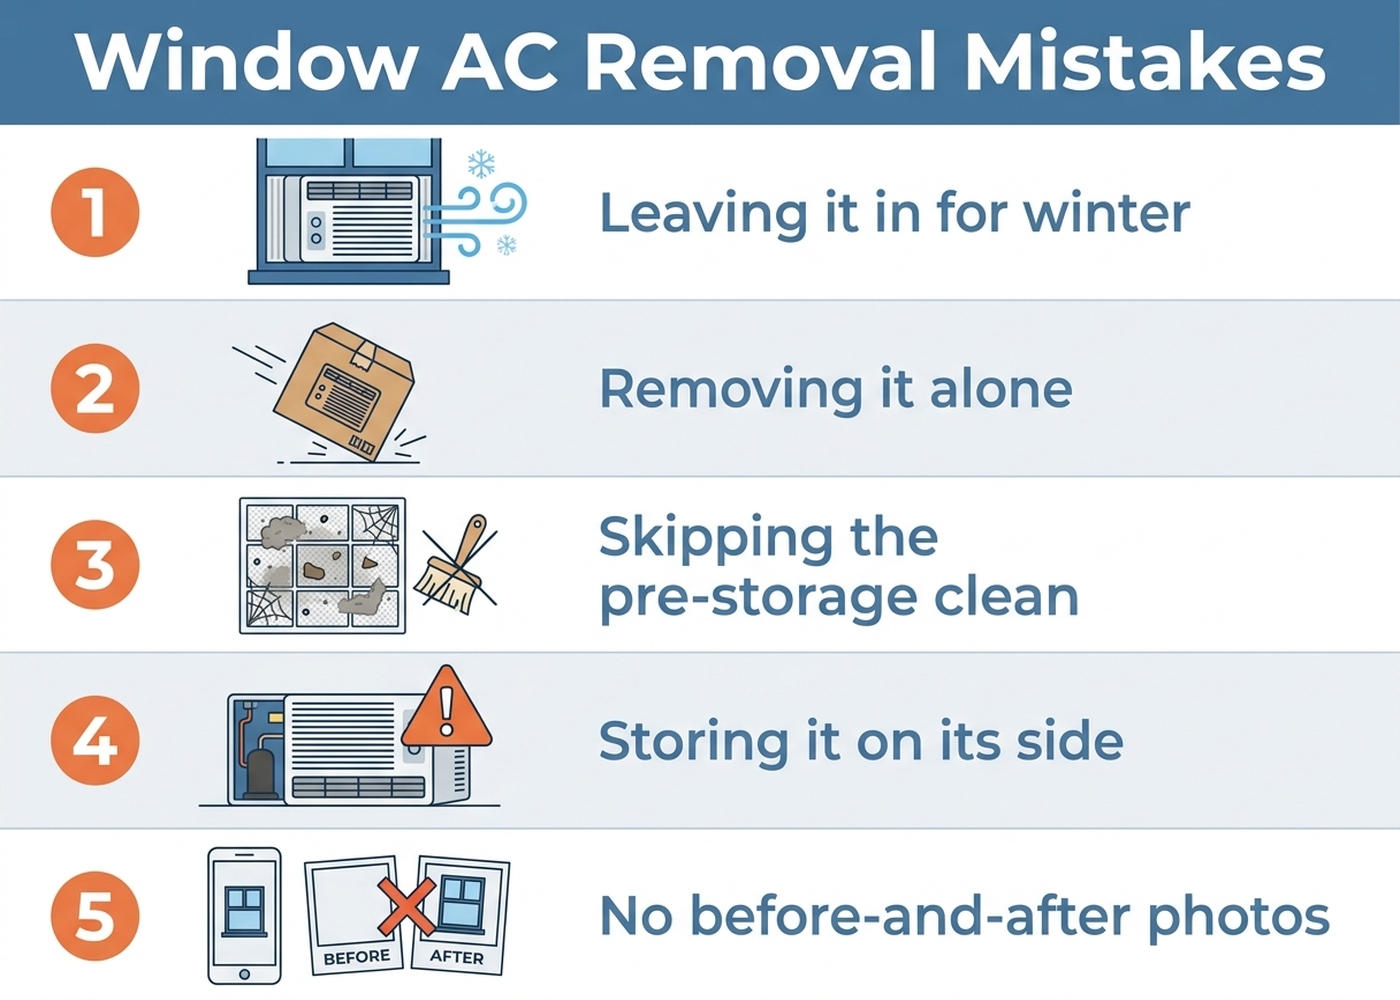
Mistake 1: Leaving It In “Just for Now”
The single most common mistake is not a removal error at all — it is not removing the unit. Reviews and forum threads describing “my room is freezing near the window” or “there’s ice on the inside of my AC” in December almost always trace back to a unit that never came out after the last hot week of September. A window AC left installed acts as a straight air channel: the accordion side panels are thin vinyl, not insulation, and the internal chassis has gaps designed for summer airflow, not winter sealing.
The dollar figure is not trivial. Unattributed HVAC-industry estimates put the winter draft penalty at roughly $40 added to the average heating bill, and suggest an unsealed window unit can waste 10–15% more energy than a properly sealed wall-mounted model — a scale of loss consistent with the Department of Energy’s broader finding that air leakage accounts for 25–40% of a typical home’s heating and cooling energy use. On top of the cost, the unit itself is at risk: manufacturers do not design window ACs for sustained freezing exposure, and components left outside their intended climate range can develop condensation and corrosion issues that show up as a compressor that will not start next May.
The fix is removal, or — if removal genuinely is not possible before a hard freeze — a proper cover. For dorm and apartment renters who cannot remove the unit before a specific date (a lease that runs past the last warm week, for instance), an outdoor cover such as the TRELC Window Air Conditioner Cover (~$20–$28 at the time of writing) with adjustable straps at least blocks precipitation and wind intrusion on the exterior half, though Consumer Reports still recommends full removal whenever the schedule allows it, since a cover does not stop the interior draft.
Check the TRELC Window AC Cover on Amazon
Mistake 2: Pulling It Out Without Support
The mistake with the most acute damage risk is the physical removal itself. The unit came in supported by two hands, an open window, and — ideally — a bracket. It has to come out the same way, except now the person doing it is often more tired, more rushed, and working alone because move-out day means everyone in the building is busy at once. Aggregated reviews of removal and support accessories describe the same failure pattern: one person tries to walk a 55–60 lb unit backward through a window opening solo, the sash slips, and the unit either drops onto the sill (cracking vinyl or wood) or tips toward the room, pulling the accordion panels loose from the frame.
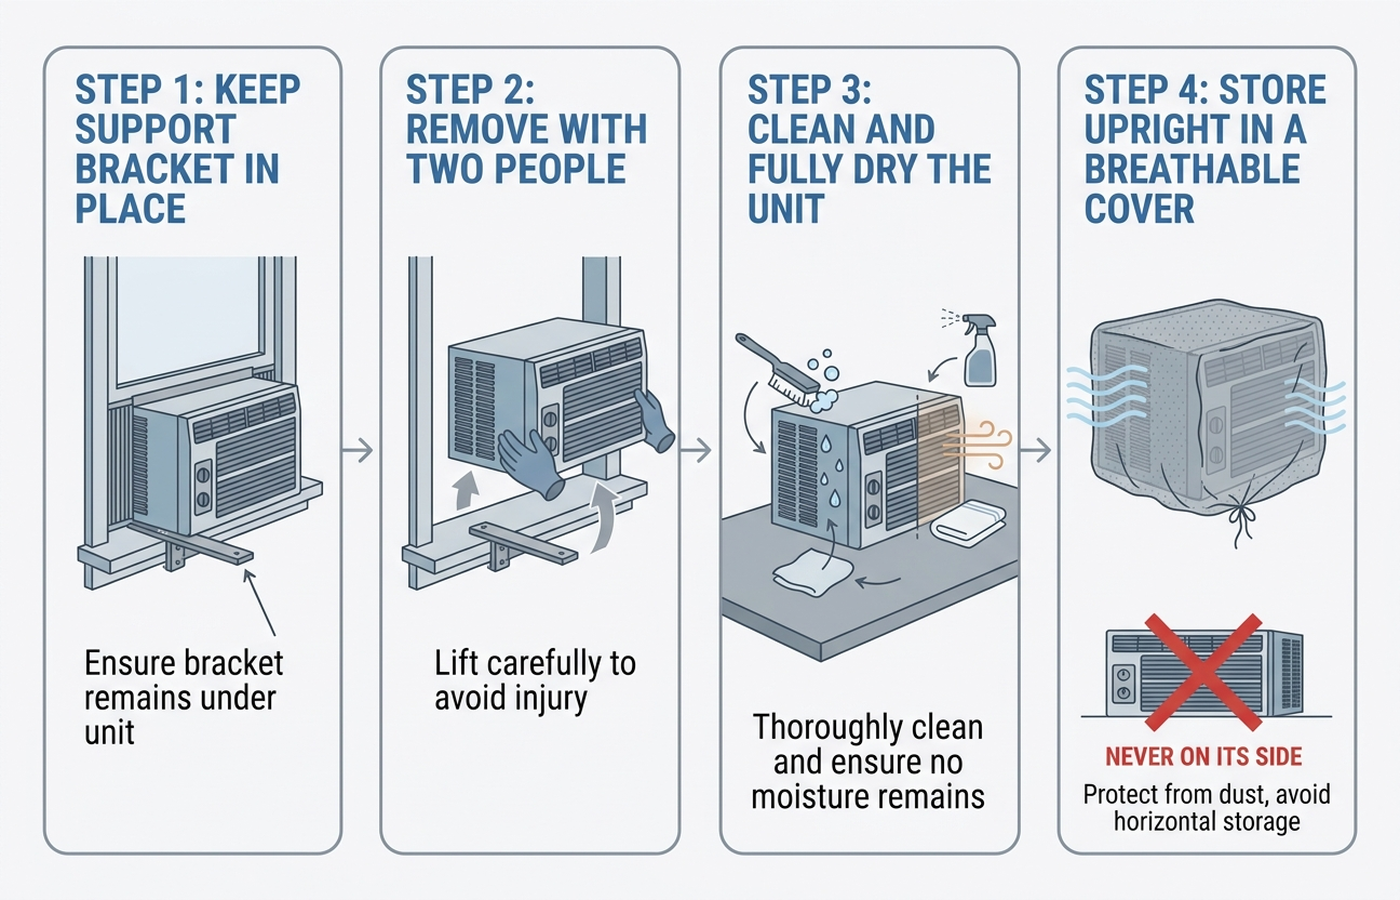
The safety guidance here mirrors installation: a second person makes removal meaningfully safer, and a unit that had a no-drill support bracket installed for the summer should keep that bracket in place until the unit is fully clear of the sash, not removed first. Repair Clinic’s removal guidance specifically calls out placing a towel under the window to catch residual condensate and removing any tape or foam sealant carefully rather than tearing it, since torn accordion panels are a common source of “why is my unit missing a piece” confusion the following spring.
The fix costs nothing beyond planning: schedule removal with a second person, keep the support bracket in place until the last step, and use painter’s tape on window tracks before cutting away any foam sealant so the frame is not scuffed in the process. If a bracket was never installed and the unit is above the ground floor, treat removal with the same caution as installation — this is not a solo job.
Mistake 3: Skipping the Pre-Storage Clean
Water pools in the base pan, dust cakes the filter, and mildew can start in the coils within days of shutdown — none of it visible from outside the unit. Reviewers who complain about a “musty smell” or “mold on the vents” the following cooling season are almost always describing a unit that went into a closet or basement dirty and wet. HVAC.com’s removal guidance is specific about the sequence: drain any remaining water, wash the filter with mild soap and water and let it fully air-dry, and vacuum the interior with a soft brush attachment before the unit goes anywhere near long-term storage.
This step also protects a deposit indirectly. A unit that smells musty when reinstalled the next spring is far more likely to get thrown out and repurchased than cleaned, and reviewers who skip cleaning report shorter unit lifespans overall — filters and coils that stay dirty across a storage cycle degrade cooling performance and can strain the compressor when the unit restarts.
The fix is entirely free — soap, water, and about twenty minutes. Remove and wash the filter, wipe down the exterior casing, vacuum the coil fins gently, and confirm the unit is bone-dry before it goes into a cover or box. Skipping this step to save time is the single highest-frequency mistake in aggregated storage-related reviews, and the only one that costs literally nothing to avoid.
Mistake 4: Storing the Unit on Its Side or Back
Once the unit is out and clean, how it sits for the next six months matters more than most renters assume. Repair Clinic and multiple HVAC service guides converge on the same warning: storing a window AC on its side or back can damage the compressor, because the compressor relies on a small internal oil reservoir that stays correctly positioned only when the unit is upright. A unit tipped on its side for a winter in a dorm closet or the trunk of a car can start its next season with oil pooled somewhere it should not be — a slow failure mode that often does not show up until the compressor seizes months later.
This mistake is common specifically because upright storage takes more floor or shelf space than laying a unit flat, and dorm and apartment storage is chronically short on both. The instinct to slide a unit under a bed on its side is understandable and is exactly the scenario the warning is written for.
The fix is a dry, upright storage spot and a breathable cover — never a sealed plastic bag. An indoor storage location such as a closet shelf or the base of a wardrobe works; the unit should stand the same way it sat in the window. Consumer-guidance sources are consistent that a breathable cover is preferable to a sealed tarp or garbage bag, since trapped moisture inside an airtight cover recreates the mildew problem Mistake 3 was meant to solve. Foam side panels such as the Frost King AC18A side panel kit ($10–$15 at the time of writing) or Duck Brand foam insulating panels ($8–$12 at the time of writing), originally bought to seal the accordion gaps in summer, can double as padding wrapped around the unit’s corners for the storage period.
Check the Frost King AC18A Side Panel Kit on Amazon
Check the Duck Brand Foam Insulating Panels on Amazon
Mistake 5: Skipping the Documentation
The last mistake happens away from the unit entirely, at the window itself. Foam residue on the frame, small scuffs from the accordion panel screws, a torn or missing screen — these are the line items renters describe finding on a move-out bill they did not expect. Tenant-guidance sources are consistent that normal wear (a screw hole from a properly installed no-drill bracket, minor fading) generally should not be deducted, but damage attributable to installation or removal — a cracked sill, a bent frame from Mistake 2, a screen never reinstalled — typically can be.
On campus, the mechanism is nearly identical: many residence-life offices inspect the window and screen condition at fall checkout specifically because window units are a recurring source of frame damage, and that inspection happens whether or not a student is present for it.
The fix takes two minutes with a phone camera. Photograph the window and screen before installation each year and again immediately after removal, reinstall the screen carefully (a screen returned crooked or missing is one of the most common inspection flags), and keep a note of the date. This costs nothing and is the single highest-leverage action in this entire article relative to the time it takes.
Fall Removal Checklist: Comparison Table
Prices are approximate amazon.com figures at the time of writing (August 2026) and fluctuate. Load and insulation figures are manufacturer or trade-source claims.
| Item | ASIN | Approx. price | Addresses mistake | Dorm/rental-safe? |
|---|---|---|---|---|
| TRELC Window AC Cover (outdoor) | B07ZH5G1RX | ~$20–$28 | #1 (unit stays in past removal date) | Yes — straps on, no drilling |
| Frost King AC18A Side Panel Kit | B001AV47RA | ~$10–$15 | #4 (padding / off-season storage) | Yes — foam, removable |
| Duck Brand Foam Insulating Panels | B002GKC2WQ | ~$8–$12 | #4 (padding / off-season storage) | Yes — foam, removable |
When Should You Actually Remove It? A Decision Flowchart
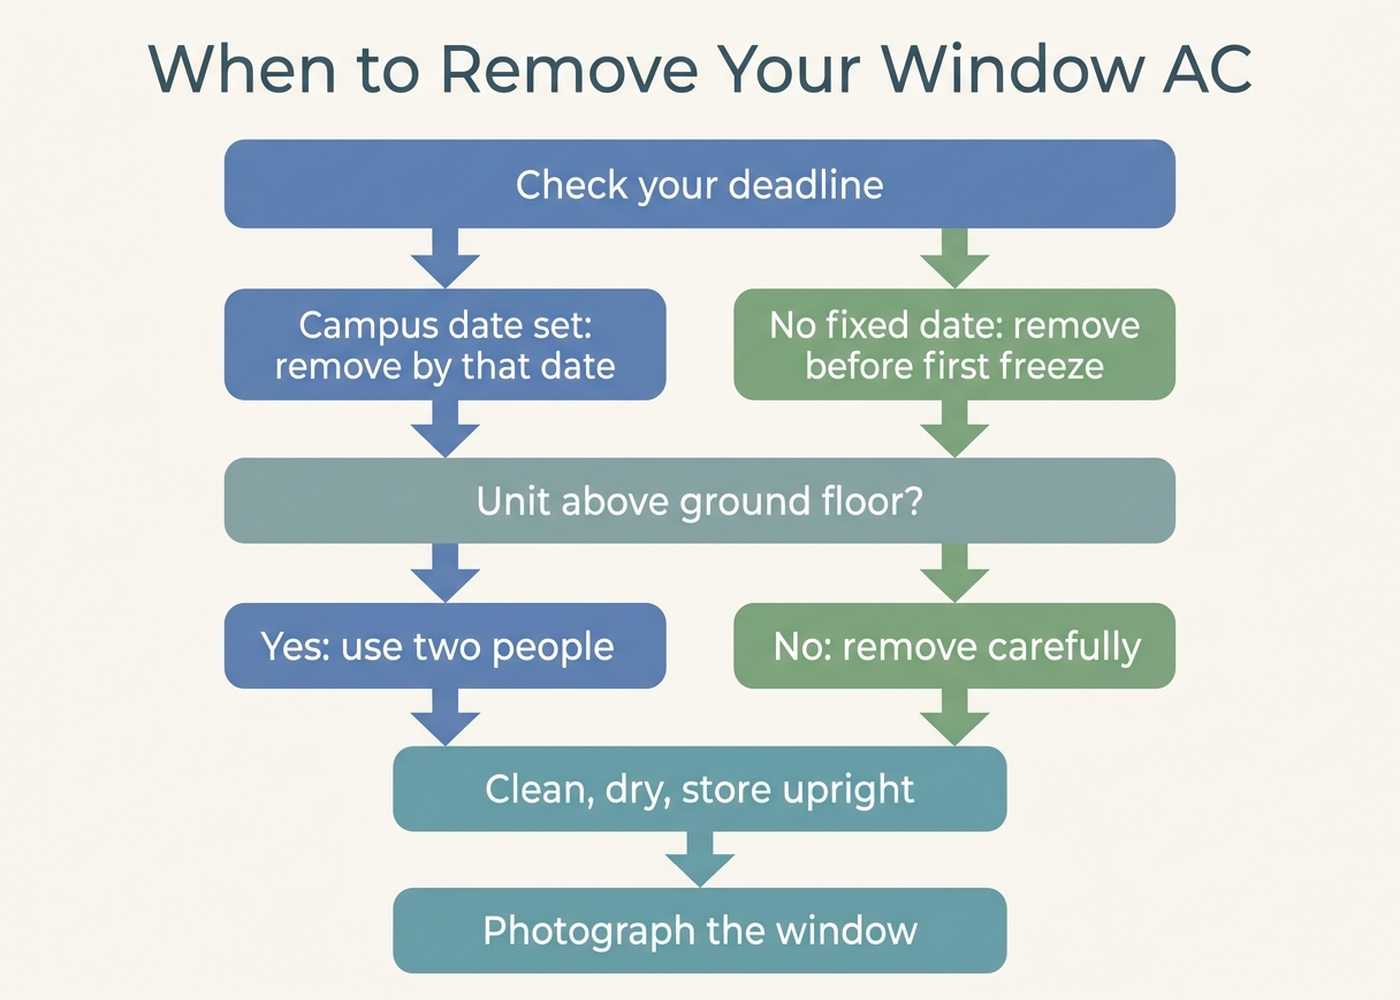
- On campus with a stated removal date? Treat it as a hard deadline — residence-life inspections are the norm, not the exception, and late removal risks a facilities charge on top of any frame damage.
- Off-campus with no fixed date? Remove before the first hard freeze in your area. A unit left through even one freeze-thaw cycle risks condensation damage that a cover alone will not prevent.
- Unit above the ground floor? Do not remove it solo. Keep the support bracket in place until the last step and have a second person ready.
- Every removal, regardless of location: clean and fully dry the unit, store it upright, and use a breathable cover rather than a sealed bag.
- Every removal, regardless of location: photograph the window and screen before and after. This is the step renters skip and later regret.
Storage Location Considerations
Not every storage spot is equal. Consumer-guidance sources recommend a dry, temperature-moderate location — a closet, a covered porch, or a climate-controlled storage unit — over an unheated garage or shed in regions with severe winters, since repeated hard freezes on residual moisture inside the unit can crack internal components over multiple seasons. Dorm residents typically have the least flexibility here, since campus storage options vary by school and many are not climate-controlled; in that situation, thorough cleaning and drying before storage (Mistake 3) matters even more, since it is the one variable a renter fully controls regardless of where the unit ends up.
Editorial Recommendations by Situation
- Dorm resident with a fixed removal date: clean the unit thoroughly, photograph the window and screen, and store upright in whatever dry space is available — campus storage lockers, a family member’s home, or a portable-storage service, in that order of practicality.
- Off-campus renter, ground-floor window: removal is lower-risk without a bracket to manage, but the cleaning and documentation steps still apply in full.
- Off-campus renter, upper-floor window: budget the time for a second person. This is the highest-consequence mistake in the article and the one least fixable with a product purchase.
- Anyone who cannot remove the unit before a hard freeze: an outdoor cover is a stopgap, not a substitute for removal — plan to pull the unit at the earliest safe opportunity.
Limitations of This Analysis
This analysis relies on publicly available customer reviews, consumer-guidance publications, government energy-loss estimates, and university housing policy pages; we did not personally remove or store these products, and individual results vary with unit age, window construction, and climate. Review themes are qualitative patterns drawn from aggregated amazon.com feedback, not a controlled survey with a fixed sample size. Energy-loss figures describe general window-unit sealing scenarios rather than a specific brand or model, and university removal policies vary by school and change year to year — check your specific housing office for exact dates and requirements. Nothing here is a substitute for a lease agreement, a campus housing contract, or the manufacturer’s own storage instructions. Prices and ASIN availability change frequently; confirm the current price and specs on the product page before buying.
The Bottom Line
Removal mistakes cost renters in three currencies: heating bills, a compressor that fails next spring, and a deposit that comes back short. All three trace back to the same five decisions — remove it on schedule, get help lifting it, clean it before it’s stored, keep it upright, and photograph the window. None of the fixes costs more than about $28, and most cost nothing but time. Whichever accessory ends up in your cart, verify the exact variant and current price before checkout — and if you want a second opinion on a specific listing, paste the URL into Arekore and let the AI scan the reviews and price history for you in about five minutes.